It all comes down to the harvest. Croptracker aims to make this - the most important few weeks of your year - easier to manage, safer for your team, and more profitable by eliminating errors and delays. In this blog post, we go over everything you need to know about harvesting with Croptracker via the mobile app. (See our previous post for how to harvest via the desktop app!)
Harvest Event Set-Up
Let's jump straight in.
- Log in to the Mobile App on your compatible iOS or Android device.
- Tap the Harvest option from the list.
- Tap the area at the top of your screen marked + or Tap to create a new harvest event...
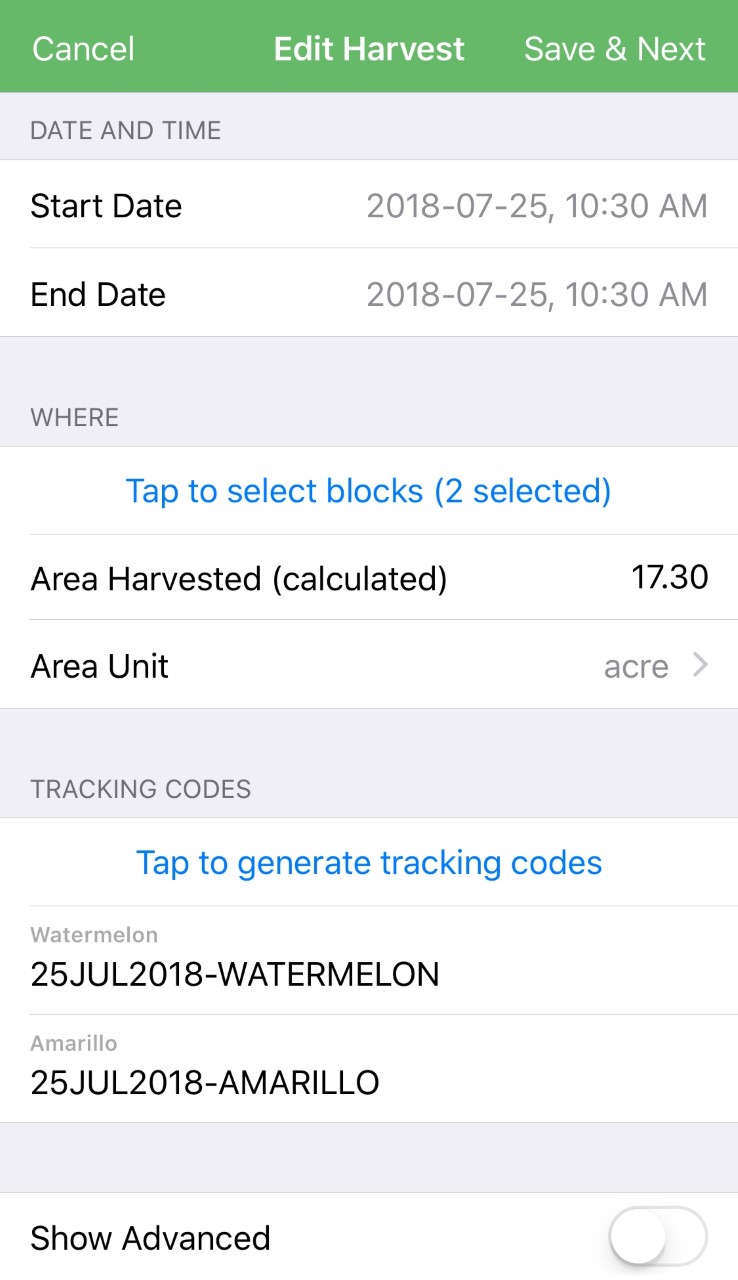
- Tap the date to select a Start Date for the event. Optionally select an End Date.
- Click Show Advanced to optionally enter any weather information, Condition of Crop, Harvest Method, and/or Management Level if applicable.
- Select the blocks you are harvesting by tapping the area marked TAP TO SELECT BLOCKS (0 SELECTED). This will take you to the block search.
- From the block search you can search for and select any number of blocks. Type the name of the block, crop type, or the crop variety in the text field at the top to quickly filter this list.
- After selecting your blocks tap the SAVE button. This will take you back to the harvest event and show the number of blocks you have selected.
- To generate tracking codes tap the GENERATE CODES button. Or type in your own tracking codes next to each block.
- Optionally specify the Area Harvested (if different from the calculated value), Packing Materials, Responsible Person, Responsible Person Assessed Site (may be applicable to certain reports), and any other applicable Comments or Notes.
- When finished tap SAVE AND CONTINUE TO INPUTS. This will take you to the Harvest Inputs screen.
Recording Harvest Inputs
 Follow these steps for each load as it arrives into your processing or storage facility.
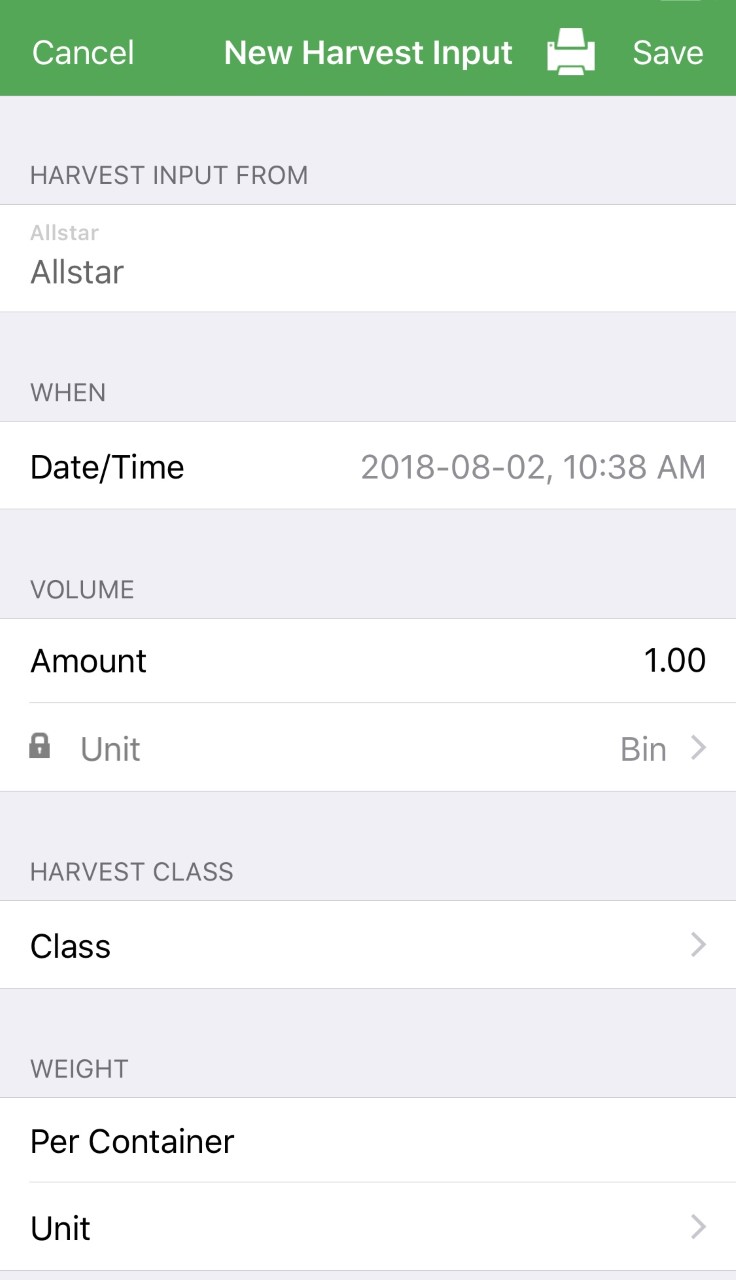
- Tap the + at the top of the Harvest Inputs screen (to which you are brought immediately after saving a new Harvest Event) to create a new harvest input. This will bring up a list of the blocks you have earmarked in this event. (If you want to record new inputs for a Harvest Event you have created previously, tap Harvest on the main page, navigate to the specific Harvest Event and tap the down-arrow beside it, then tap List Harvest Inputs, then the + at the top of the screen.)
- Tap the block from which this load originated.
- Under the Volume section: Enter the Volume for this load. Specify the type of container in the Units dropdown.
- Under the Weight section: Enter the weight in the Per Container input. Specify the weight unit type in the Units dropdown.
- Optionally enter any size information, storage information, or work crews.
- Select your Label Format in the dropdown under the Label section.
- Select your Label Printer.
- When finished tap the Save button.
If you do not have any printers configured, see Cloud Printing - Google Cloud Printer Setup on our Knowledge Base.
Want to learn how to execute your harvest with Croptracker via our desktop app? See our previous blog post here.
Need a refresher on any of Croptracker's features? Head over to our Knowledge Base, where you'll find step-by-step tutorials as well as common troubleshooting tips and more. And as always, if you're ever stuck, never hesitate to e-mail us at support@croptracker.com or Live Chat with us by clicking the green speech bubble ![]() in your bottom right-hand corner. We're always happy to help you let Croptracker make your farm become more efficient, safe, and profitable!
in your bottom right-hand corner. We're always happy to help you let Croptracker make your farm become more efficient, safe, and profitable!
| Missed Last Week's Blog Post? Getting Ready To Harvest With Croptracker (Desktop) |